Help › Issues
Issues
Issues tracks anything residents raise with the directors and managing agent, from a faulty door or leak to noise or suspected short lets. Several households can be recorded against the same issue, and every update is kept in a timeline.
The issues list
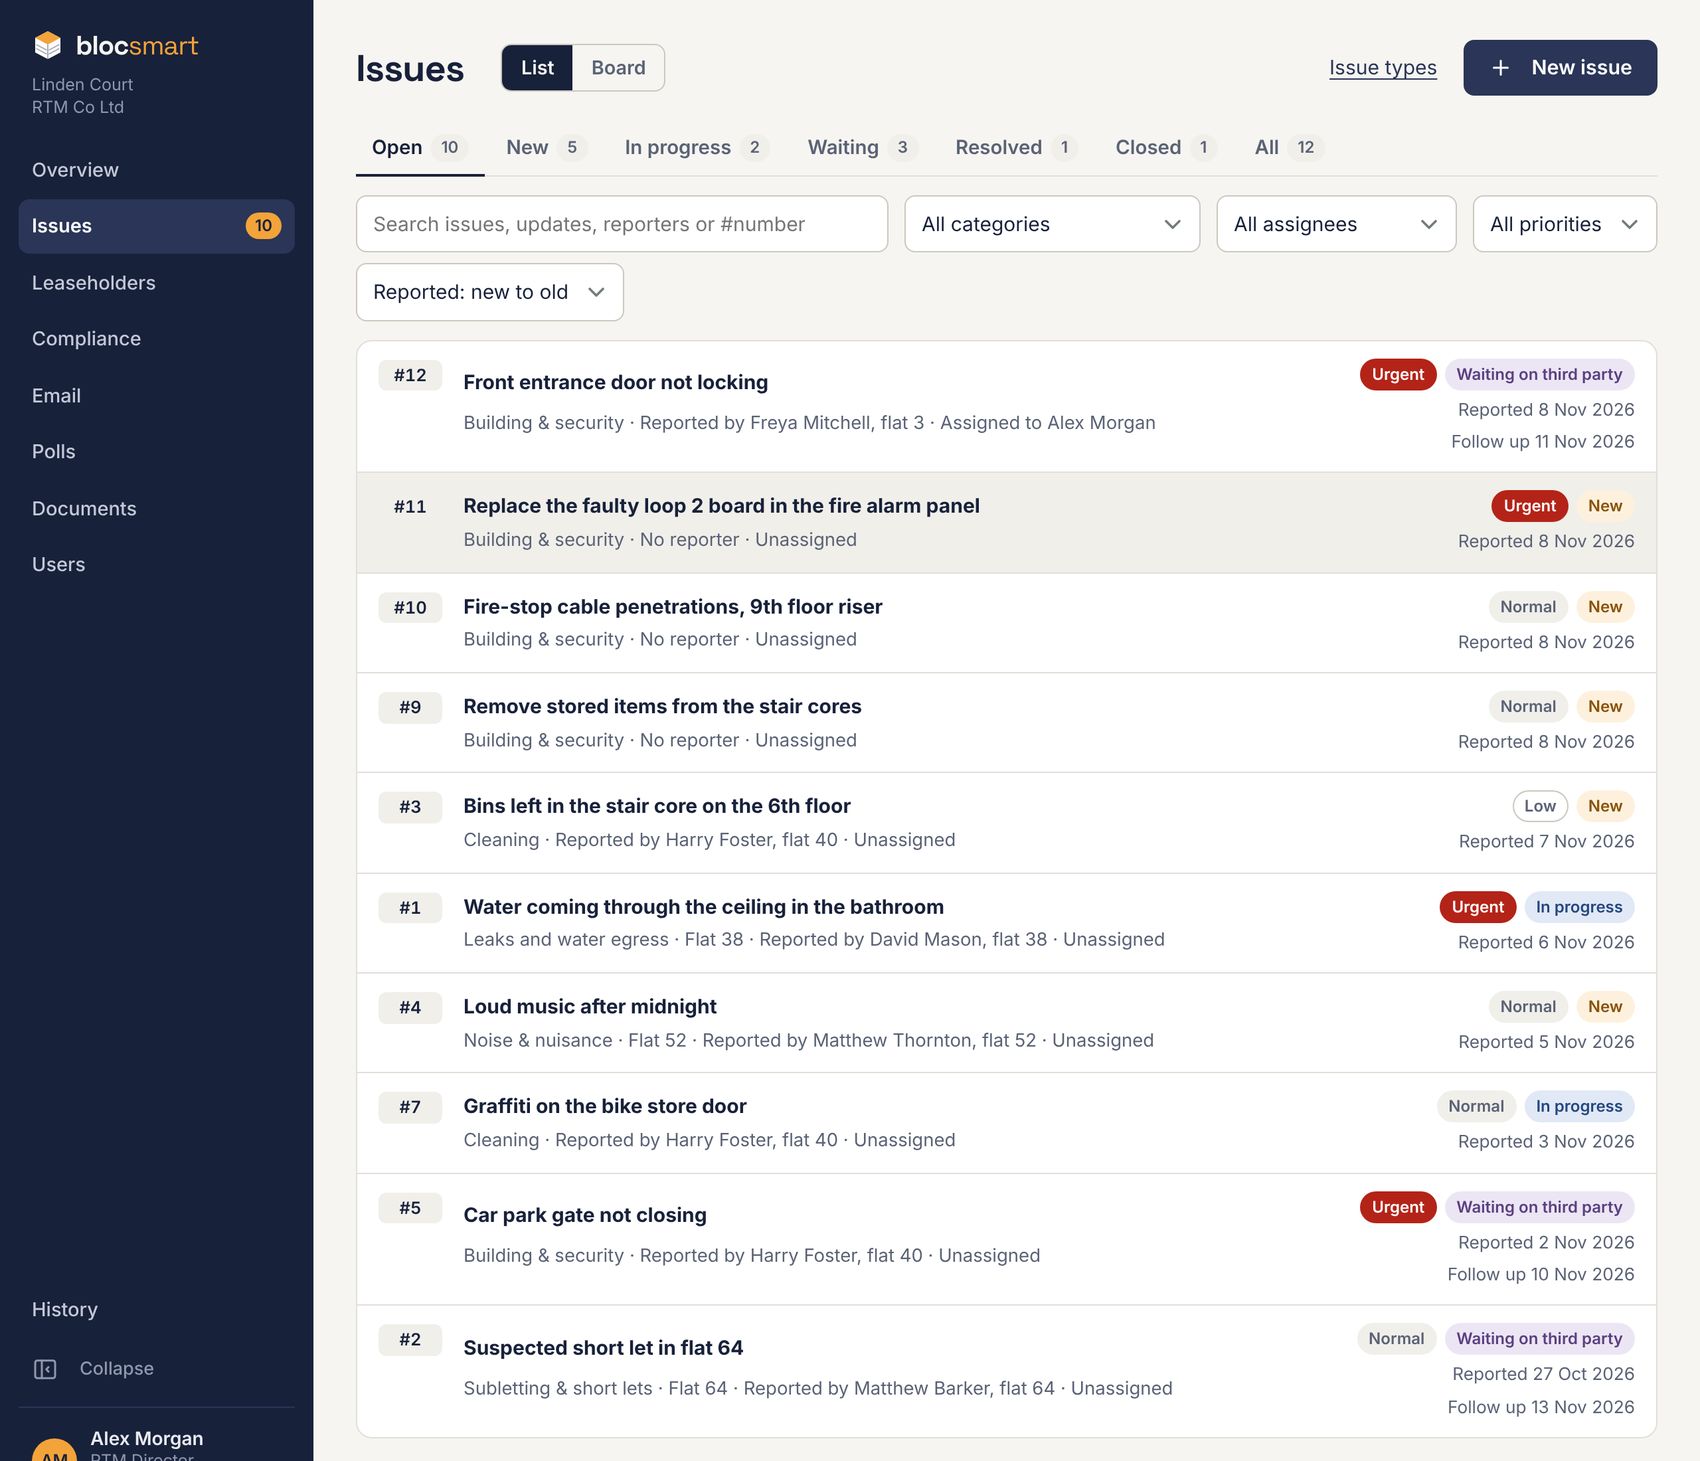
- Tabs filter by status: Open (everything not yet resolved or closed, the default), New, In progress, Waiting, Resolved, Closed and All, with how many are in each.
- Search looks through titles, descriptions, updates and reporters’ names. Type a number such as 12 or #12 to find that issue, whatever tab you’re on.
- Filter by category, assignee (including Me and Unassigned) and priority (Urgent, Normal, Low).
- Sort by when issues were reported, last updated or added to blocsmart, newest or oldest first.
- A blue dot marks issues someone else has changed since you last opened them. A follow-up date that has passed shows in red.
On a phone, the category, assignee, priority and sort choices are behind a Filters button.
The board
On a computer, press Board next to List to see issues as cards in one column per status. Resolved and Closed show the last 30 days. blocsmart remembers your choice.
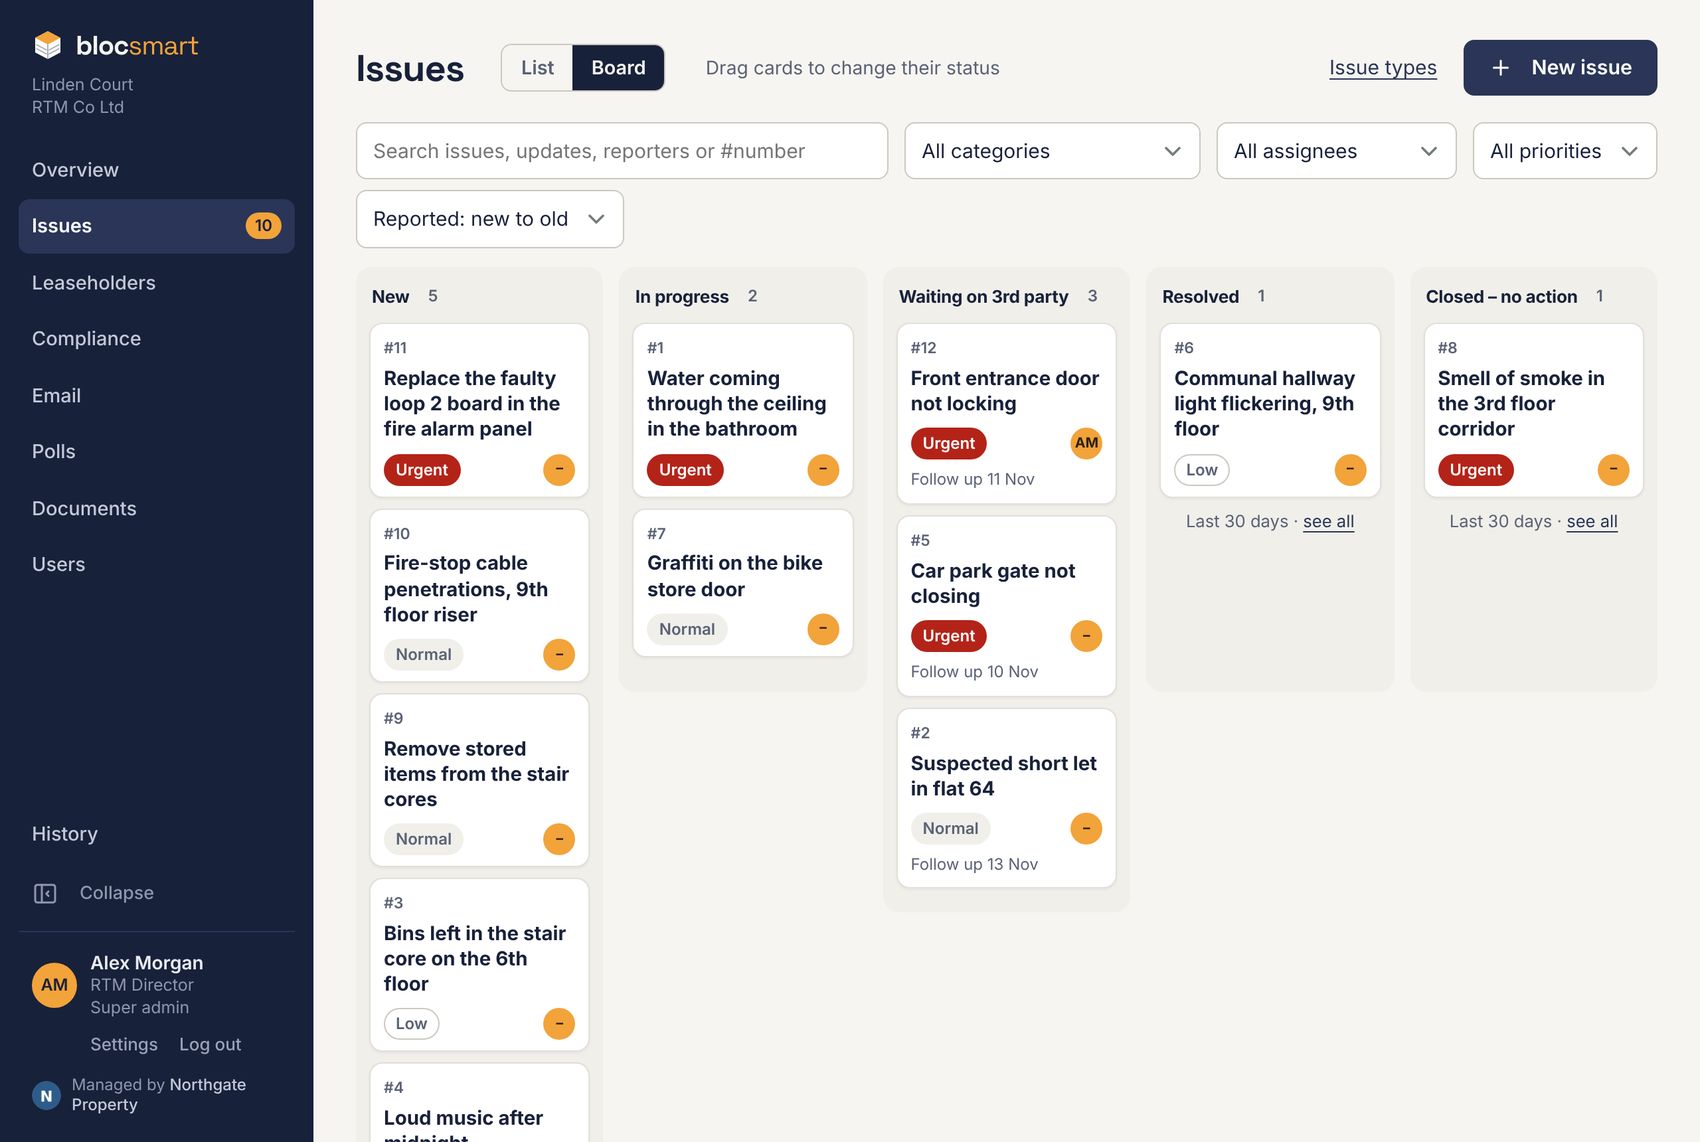
- Drag a card to another column to change its status.
- For Waiting, choose who it’s waiting on and, if you like, a follow-up date. For Resolved or Closed, write the resolution.
- Press Move. Use its ▾ to also email the reporters (see Emailing the reporters).
Creating an issue
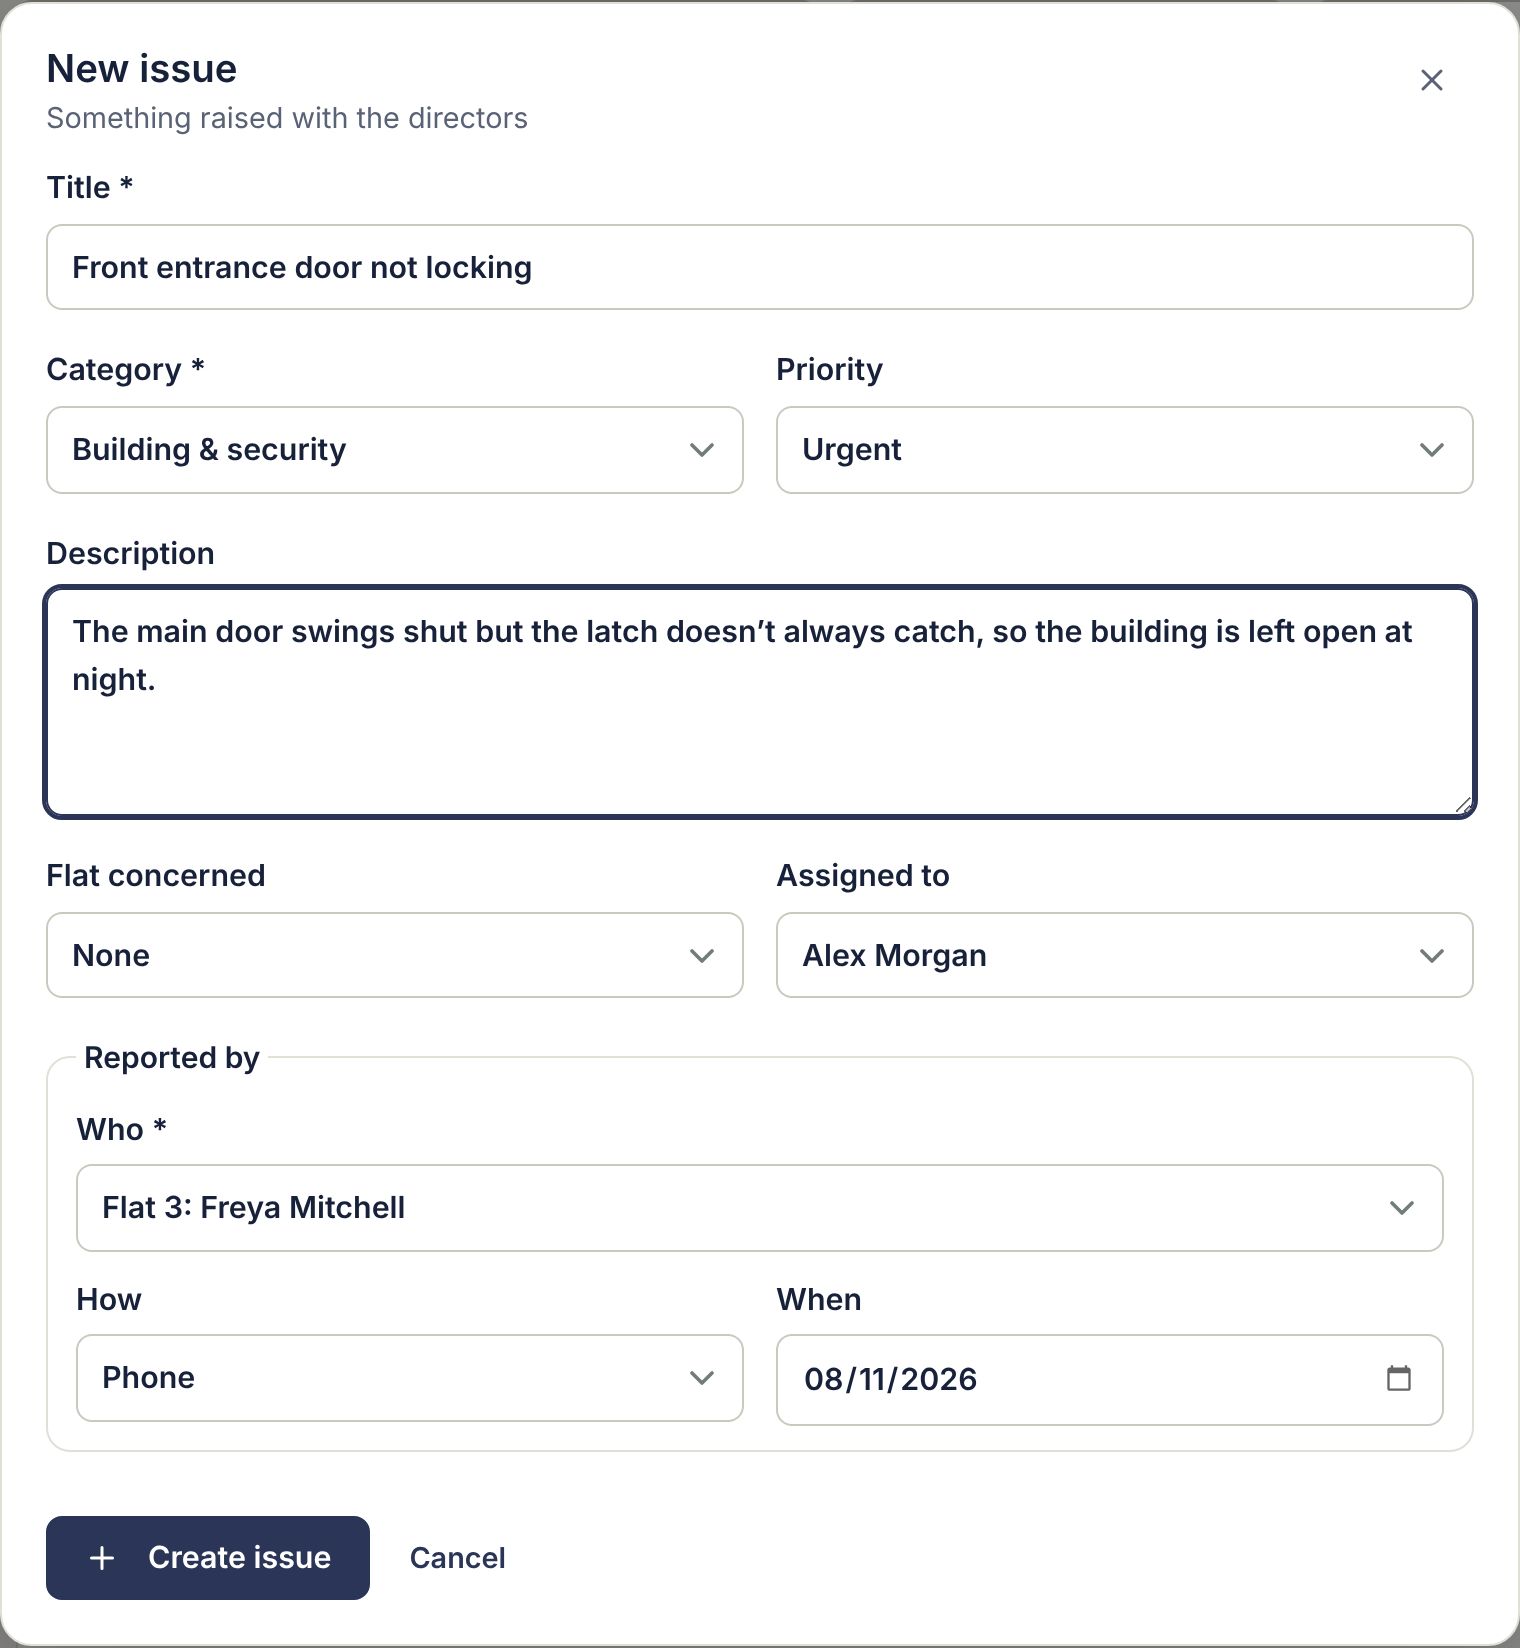
- Press New issue on the Issues page (or on a flat’s page, which fills in the flat).
- Give it a short Title, choose a Category and set the Priority.
- Describe what was reported in Description.
- If it concerns a particular flat, choose it under Flat concerned. Choose who it’s Assigned to (it defaults to you).
- Under Reported by, choose who reported it (any leaseholder, tenant or dashboard user), how they got in touch and when.
- Press Create issue.
Before creating an issue, search the list to check it hasn’t already been reported. If it has, add the new person as a reporter instead (see Reporters).
The issue page and adding updates
Click an issue to open it. The description, checklists and a box for updates are on the left, with the timeline of everything that has happened underneath. Following, documents, emails, details and reporters are on the right.
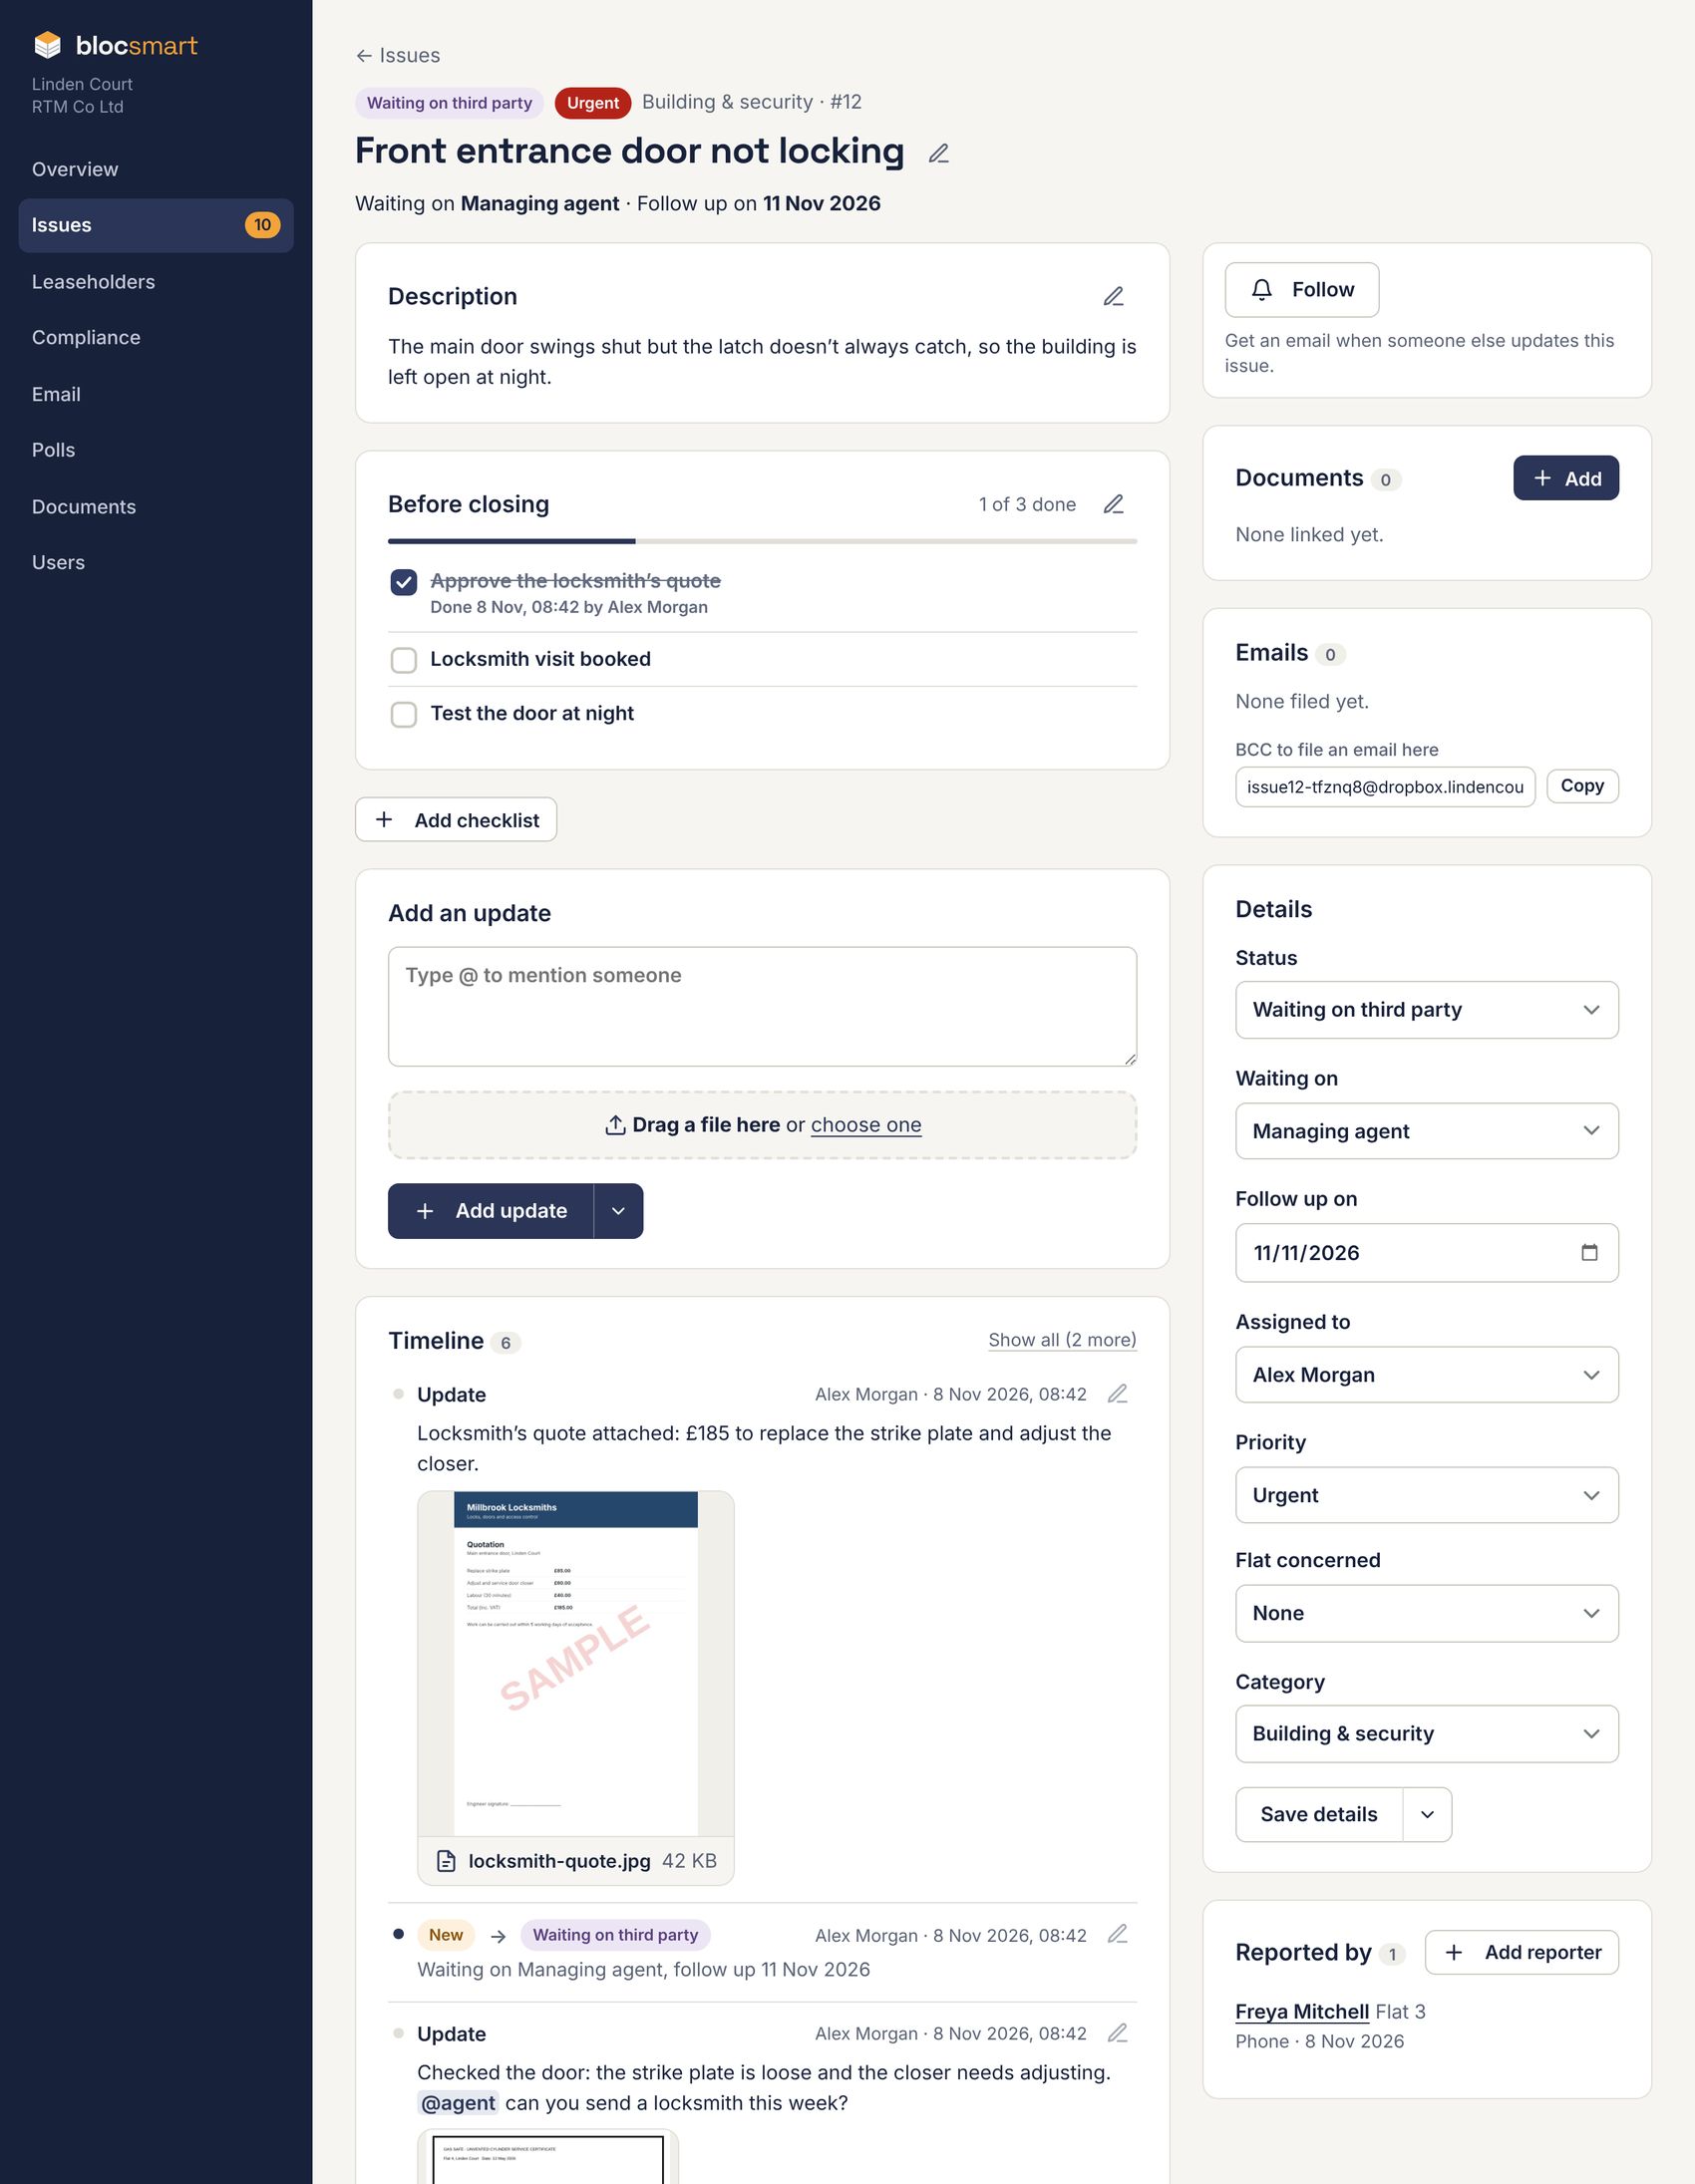
- Type what has happened in Add an update.
- Optionally attach a file (photo, PDF, Word or Excel document, or saved email) by dragging it onto the dashed box or clicking it.
- Press Add update.
Photos and PDFs show as previews in the timeline; click one to see it full size and download it. Web addresses become links. Pressing Add update also saves anything you’ve changed but not yet saved under Details.
Mentioning people with @
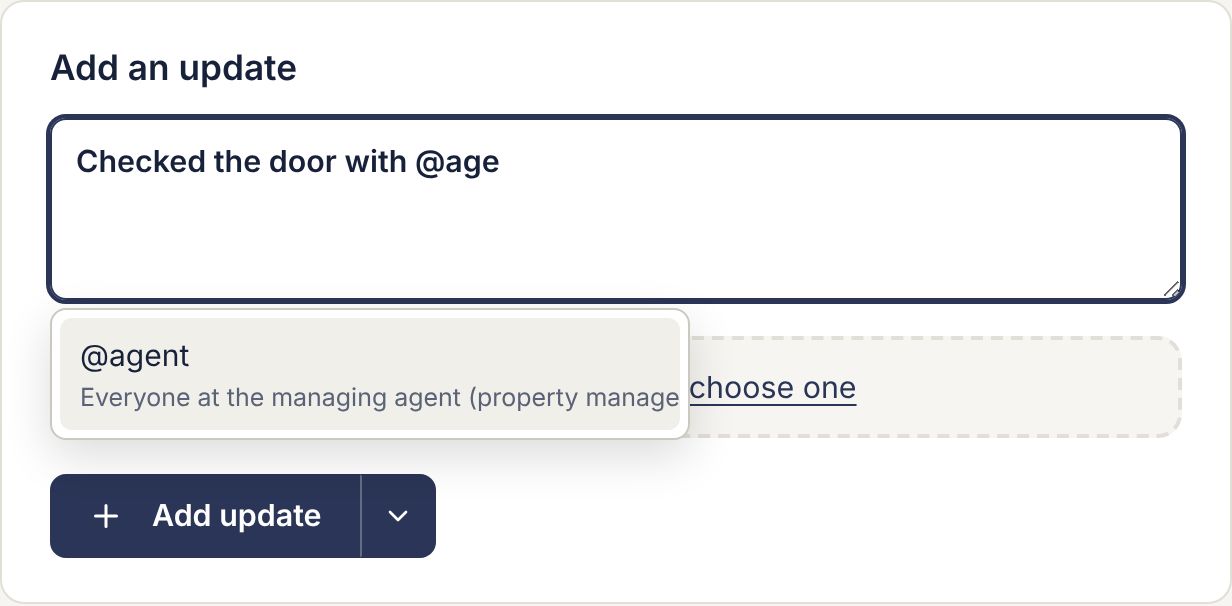
Type @ in a description or update to mention someone. Suggestions appear as you type. Mentioned people get an email (unless they’ve turned it off, Your settings).
| Mention | Emails |
|---|---|
@name | That person. |
@directors | Everyone with the RTM Director role. |
@agent | Everyone with the Property Manager role. |
@everyone | Every active user. |
Emailing the reporters
When a reporter has an email address, Add update, Save details and the board’s Move have a ▾ next to them. Press it and choose … and email reporter (or reporters).
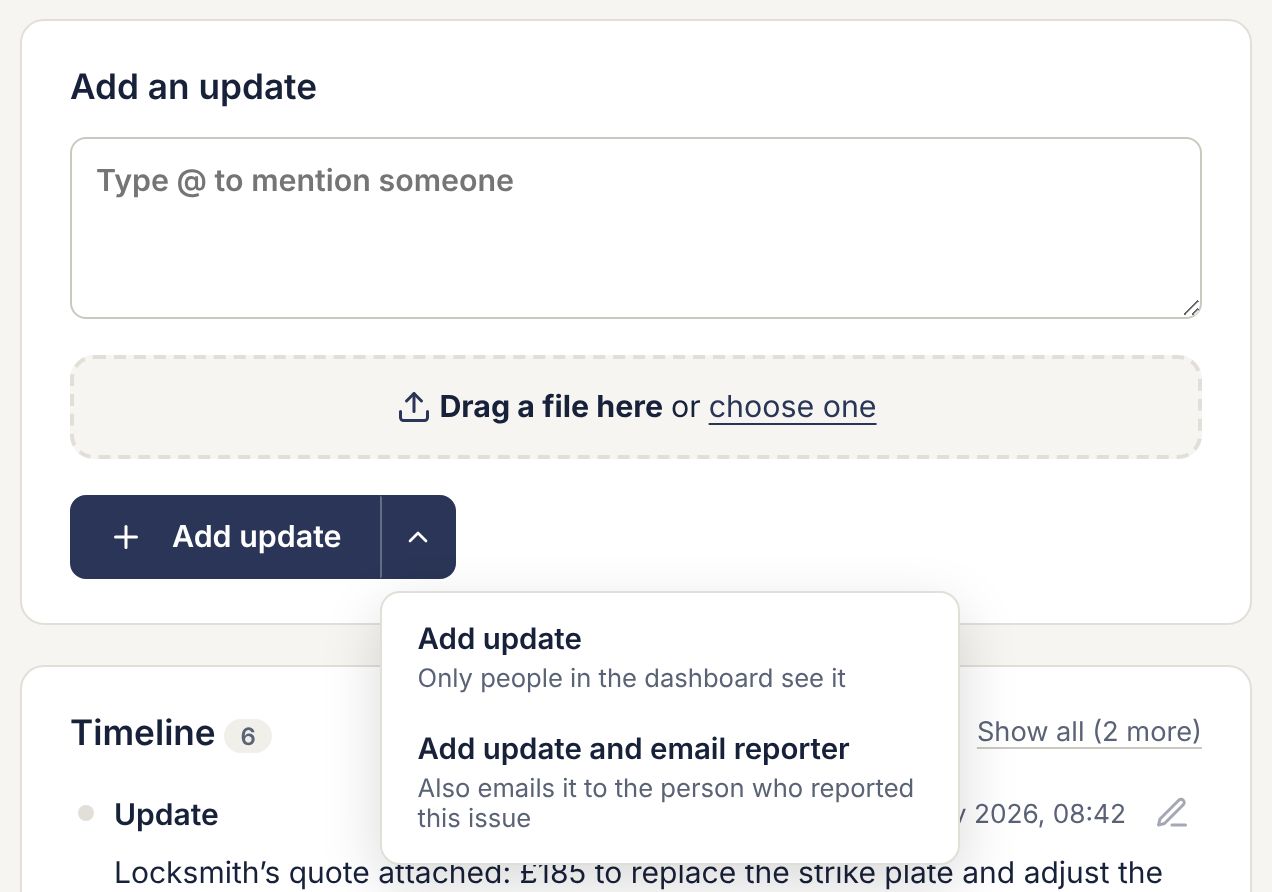
They get “An issue you reported has been updated” with your update, the current status, the resolution (if resolved or closed) and any files. Replies go to the directors’ address. Nothing is emailed unless you choose it, and the timeline records who was emailed.
Status, waiting and follow-up dates
The Details panel on the right holds the status, who it’s assigned to, priority, flat and category. Change any of them and press Save details; the change is recorded in the timeline.
| Status | Use it when |
|---|---|
| New | Just reported; nobody has picked it up yet. |
| In progress | Someone is dealing with it. |
| Waiting on third party | You’re waiting for someone else. Choose who under Waiting on: Managing agent, Directors, Contractor, Council or Someone else. |
| Resolved | It has been sorted out. Needs a short resolution note. |
| Closed – no action | No action is needed or possible. Needs a short note saying why. |
Set a Follow up on date to chase it. At 9am on that date, the person it’s assigned to and its followers get an email (see Your settings), and once it passes the date shows in red in the list.
Resolved and closed issues leave the Open tab but are kept. If the problem comes back, open the issue and press Reopen.
Reporters
When another household reports the same problem, add them to the existing issue rather than creating a new one.
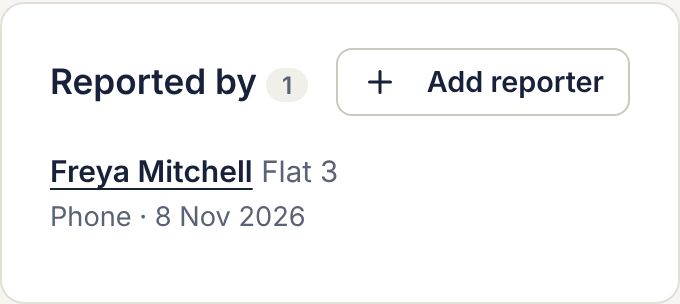
- Press Add reporter under Reported by.
- Choose who, how they got in touch and when. Add a note if useful.
- Press Add reporter.
To remove a reporter added by mistake, press the bin next to their name and confirm.
Checklists
A checklist breaks an issue into steps, such as the stages of dealing with a short let. An issue can have several.
- Press Add checklist under the description.
- Give it a name and type the items (up to 20; press + Add another item for more). You can assign each item to someone.
- Press Add checklist.
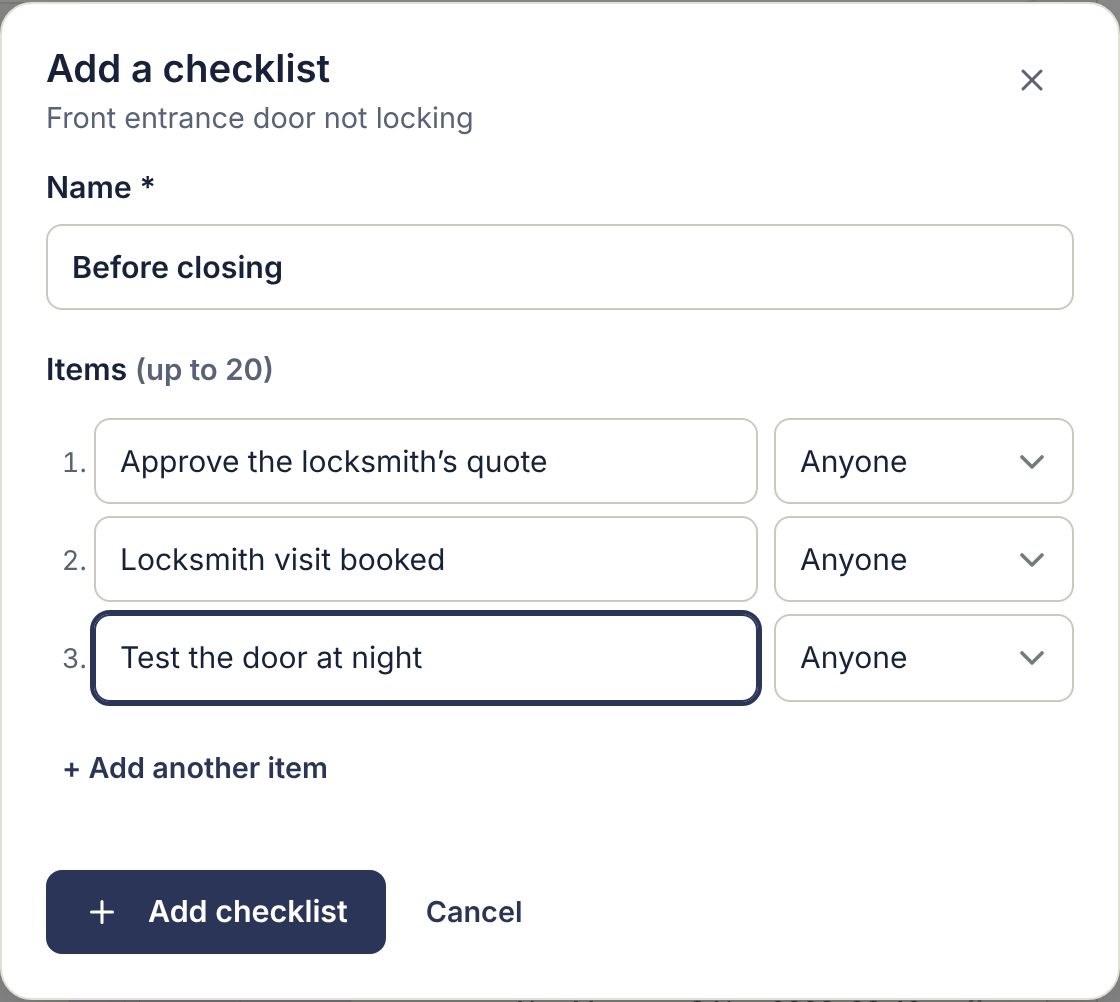
Click an item to tick it off; the timeline records who did it and when. Use the pencil on a checklist to rename it, change its items or delete it.
Following, documents and emails
- Follow gets you an email whenever someone else updates the issue. Press Following to stop.
- Documents lists documents linked to the issue (see Documents). Press Add to upload one already linked.
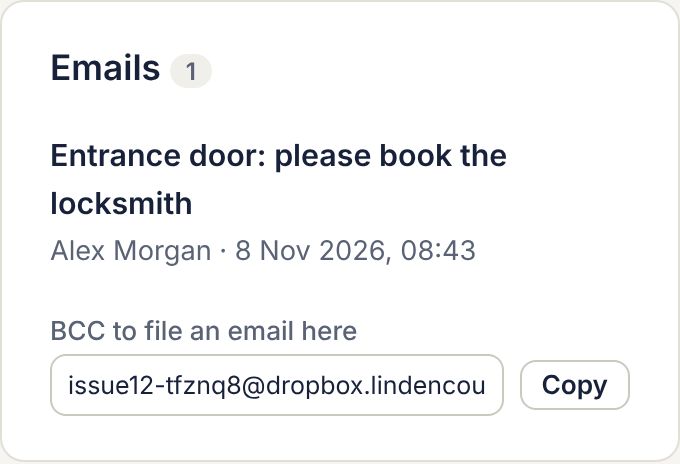
- Emails lists emails filed under the issue, and shows its own dropbox address: BCC it and the email is filed straight under the issue, appearing in the timeline (see How the dropbox works).
Editing the title, description or an update
- Title: press the pencil next to the title, change it and press Save.
- Description: press the pencil at the top right of the Description box.
- An update: press its pencil in the timeline. Change the text, or tick the box to remove its attachment, and press Save. Edited updates are marked “edited”.
Issue types
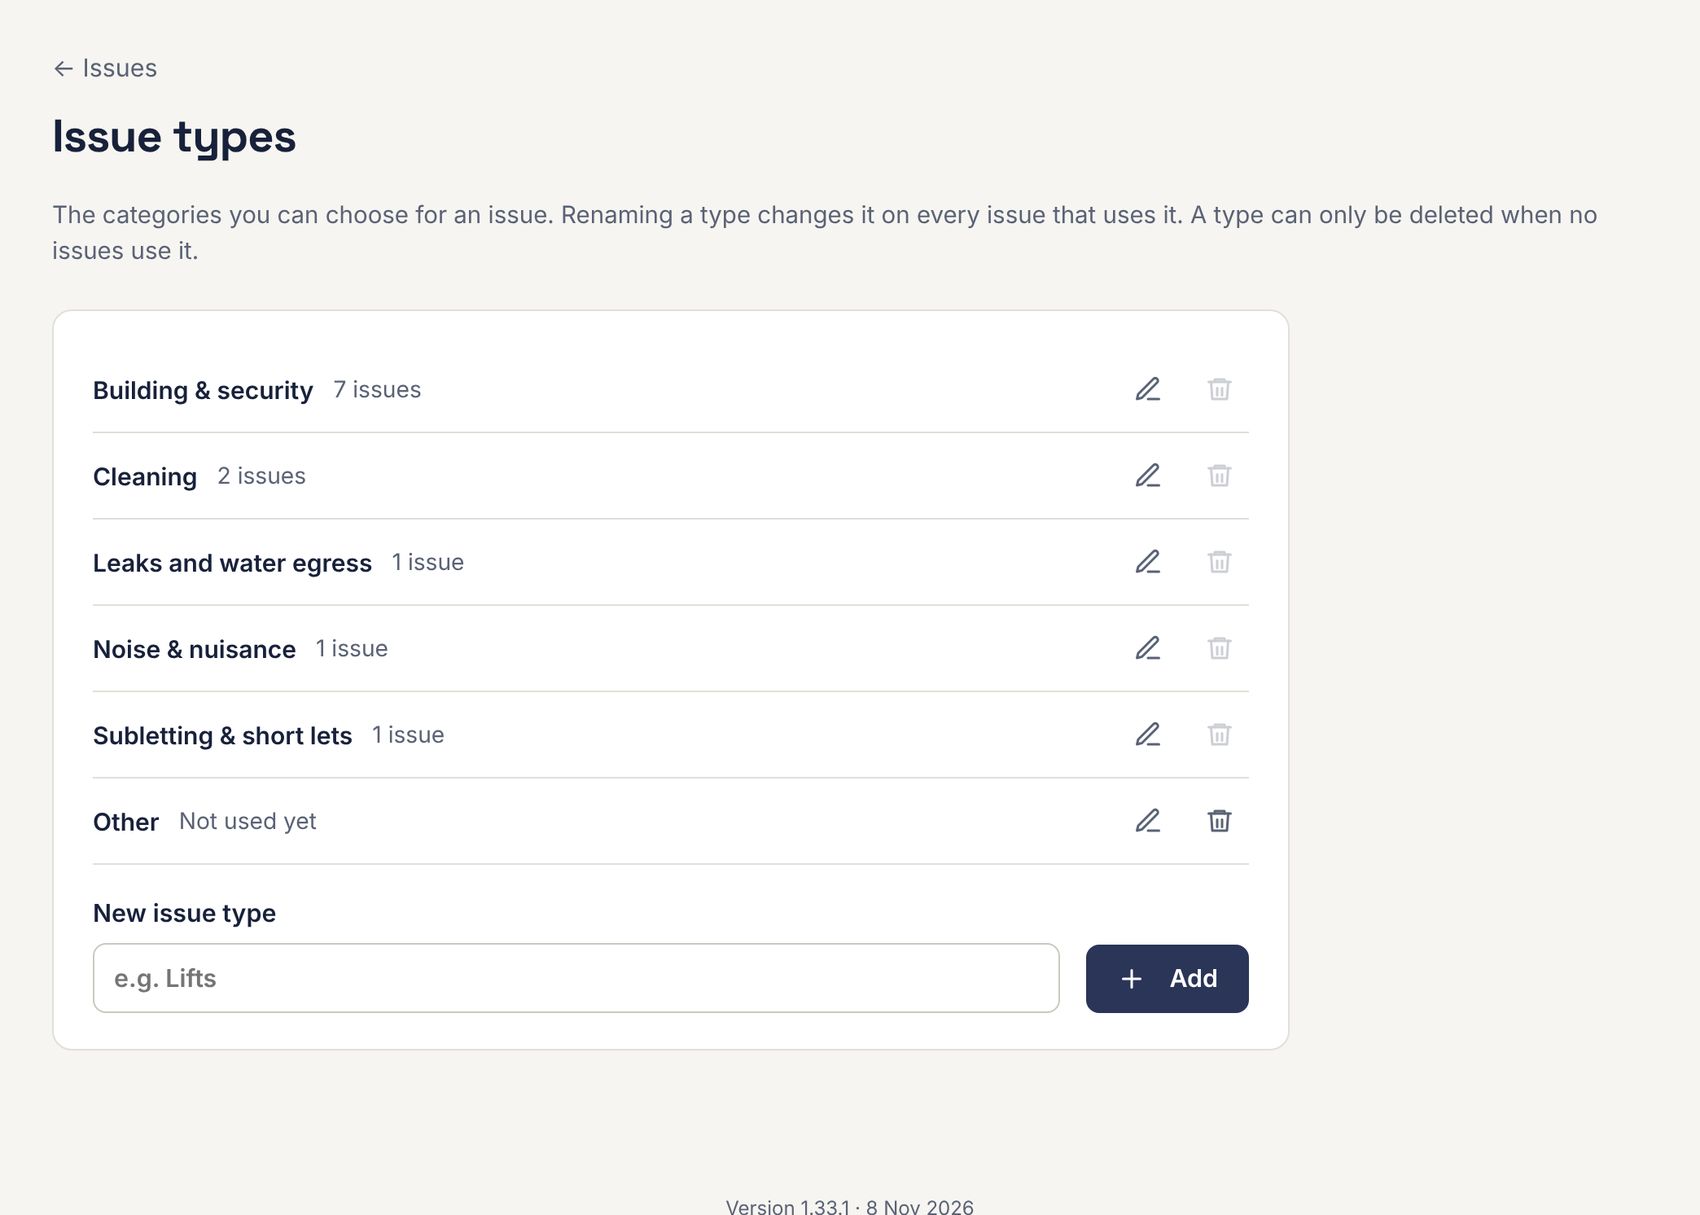
Go to Issues and press Issue types to manage the categories. Renaming a type changes it on every issue that uses it. A type can only be deleted when no issue uses it. Add a new one under New issue type.
How residents report issues
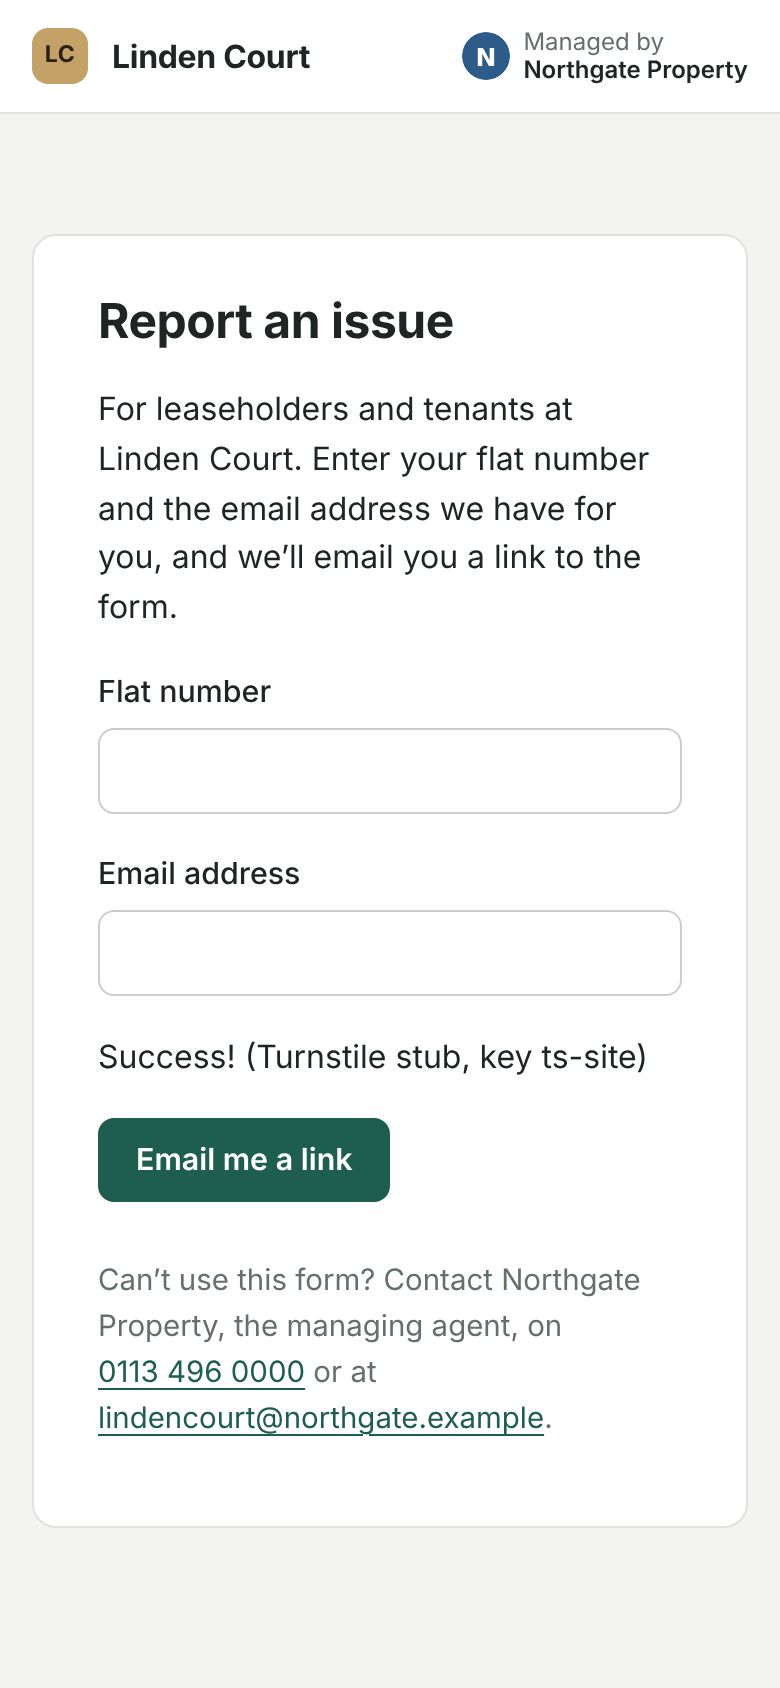
Leaseholders and tenants can report an issue online at your building’s report page, without logging in.
- They enter their flat number and the email address we hold for them. If it matches, blocsmart emails them a link to the form. The link works for 24 hours.
- They choose the type of issue, describe it, add their phone number and any photos or files, and send it.
- The issue appears in blocsmart as New, reported through the online form, and they get a copy by email.